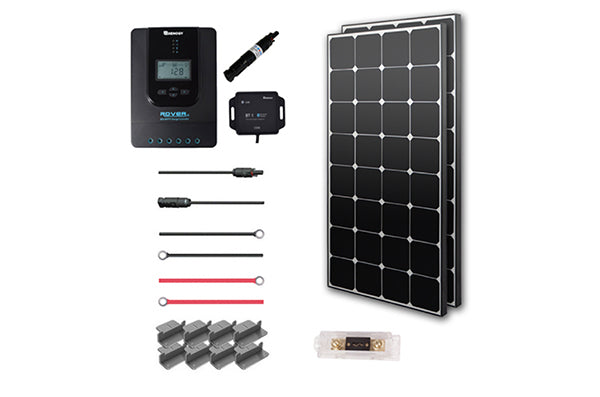
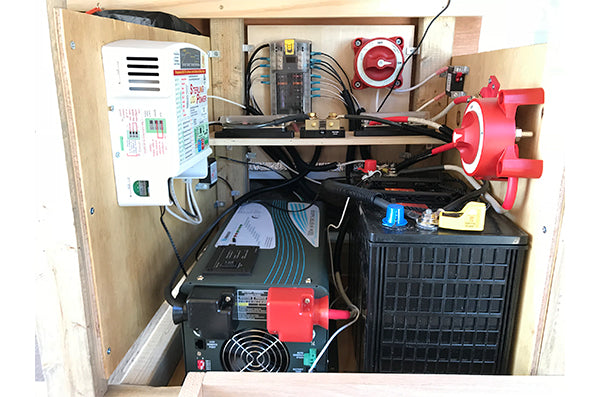
One key element of being self sufficient in your van is the ability to harness power from the sun, otherwise known as solar power. The two main components to the solar design are the solar panels and the charge controller. Long story short, the solar panels will create energy from the sun and then send that energy through a charge controller to regulate the charge to your battery. There are a few key factors to consider when designing your system: Size of your solar array (how much wattage do you need from your panels), type of panel (polycrystalline or monocrystalline), design of panel (rigid vs flexible), type of controller (PWM vs MPPT), and size of your charge controller.
1. Sizing your solar array: The size of your array will depends on the size of your house battery and your projected daily power consumption. On average, a 100 watt solar panel will produce 30 charging amp hours per day. This is calculated by 5 hours of peak sun x 6 charging amps per hour (100 watts / 18v). It is important to note that solar panels do not run at 12v. Your panels will have an "optimum operating volage" which typically is about 18v, but should be the factor in your calculation. In a previous post titled Electrical Design / Install, we sized our daily power consumption at 44 amp hours. In order to get our battery to 100% each day, we would require 160 watts of solar (160 watts / 18v) * 5 hours of peak sun = 44 amp hours. We chose to use 2 100 watt panels to cover any overages in our power consumption, rainy days, etc.
2. Choosing the type of panel: There are two types of solar panels available: Polycrystalline (many crystals) or Monocrystalline (single crystal) . The larger the crystal sizes, the more efficient the cells are at converting sunlight into electricity. Mono panels tend to be 10%-15% more efficient than Poly due to the crystal size, but also are about 10% more expensive. Efficiency in solar is defined as the portion of the sunlight that can be converted into electricity. We decided to use the Mono panels in order to optimize the limited space on our van roof.
3. Choosing a panel design: New technology has enabled cost effective, flexible solar panels. We were going to be securing our panels to our Rino Rack Pioneer tray roof rack, so felt more comfortable with brackets and screws rather than adhesive. Flexible panels could be a great option for those without a roof rack.
4. Choosing a Charge Controller: The one major decision when choosing a charger controller is PWM or MPPT. Just like the different types of panels, the main difference between these two options is efficiency and cost. A PWM controller is essentially a switch connecting the panels to the battery. In most cases, the panels will generate more voltage than can be consumed by the 12v battery resulting in loss of potential charging power. An MPPT charge controller is more advanced and designed to convert the excess voltage into amps, keeping the charging voltage optimal while reducing the overall charging time. We again opted for efficiency, despite the additional cost and chose an MPPT charge controller.
5. Sizing your charge controller: Solar charge controllers come in a variety of sizes e.g., 20 amp, 30 amp, etc and are sized based on the current from the solar panels and your systems voltage. For instance (2 x 100 watt panels / 12 v) = 16.7 amps. It is suggest you multiple this amp number by 25% to allow for cold temperatures. Our controller then would need to support 20.8 amps. Best practice is to round up, but we purchased a kit and the manufacturer suggested a 20 amp controller.
After significant research, we landed on the Renogy 200 Watt 12 volt Premium Kit with the Eclipse panels. These panels are lower profile and slightly narrower, which was a perfect fit on either side of our fan on the roof.
This kit includes everything you need for the install except the tools!
Stay tuned for our next post on the installing the Renogy kit.


4 comments
Larry
William,
We purchased and had the roof rack installed at Road Warriors in Broomfield, CO. You can see more details on our roof rack blog post (https://seekdrygoods.com/blogs/van-life/ford-transit-van-conversion-roof-rack). Yes, our Transit is the high roof. Hope that helps!
William,
We purchased and had the roof rack installed at Road Warriors in Broomfield, CO. You can see more details on our roof rack blog post (https://seekdrygoods.com/blogs/van-life/ford-transit-van-conversion-roof-rack). Yes, our Transit is the high roof. Hope that helps!
WILLIAM CORROTHERS
Can you tell me where you purchased your black platform rack system for the top of your Transit van. And is yours a high top Transit?
Can you tell me where you purchased your black platform rack system for the top of your Transit van. And is yours a high top Transit?
Amanda - Seek Dry Goods
PicMan- we just added a photo in here and will add more when we write-up the Renogy install! No, we don’t have a hammock stand up there! A bit too high for our taste haha. But we do plan on enjoying some sunsets up there soon :)
PicMan- we just added a photo in here and will add more when we write-up the Renogy install! No, we don’t have a hammock stand up there! A bit too high for our taste haha. But we do plan on enjoying some sunsets up there soon :)
PicMan
I’d love to see the solar panels on the roof rack to get an idea of how you’re using it. Do you spend much time hanging out up there? And have you gotten a hammock stand for it yet? :)
I’d love to see the solar panels on the roof rack to get an idea of how you’re using it. Do you spend much time hanging out up there? And have you gotten a hammock stand for it yet? :)