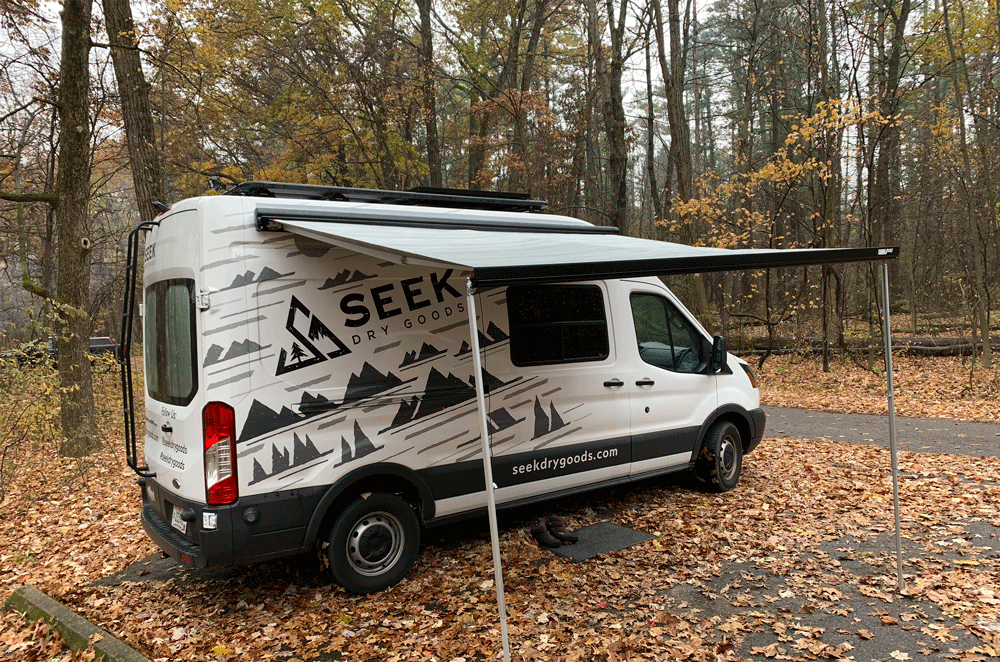
The addition of an awning to your van build not only provides protection from the rain and sun, but brings a sense expansion and openness to the overall living space. There are many awning options to choose from, but they all fall into two main categories: hard case or soft case. The hard case awnings either have an electric or manual crank deploy method while the soft case typically requires unzipping the case and manually deploying the awning. Based on the height of our high roof Ford Transit, we decided to go with the hard case for ease of use and convenience despite the higher cost.
There are a few major manufacturers of hard case awnings, Fiamma, Dometic and Thule to name a few. We landed on Fiamma based on several recommendations, positive reviews and the offering of an adapter for the high roof Transit to make the installation easier. We ended up selecting the Fiamma F45s which measures 10'1" long with an 8'2" deploy, providing 80 sq ft of covered space! A copy of our order form from Fiamma is detailed below with all part numbers and specifics, as there are many options available on the Fiamma website. KEY TIP: Installing the awning is much easier before you have completed your walls and ceiling as access to the interior upper passenger side of the van is needed.

Tools & Hardware
Fiamma 45S awning - fiamma.comString line level - amazon.com
Milwaukee Tool drill and impact driver - amazon.com
Wet/Dry vac -amazon.com
Metal File -amazon.com
Rustoleum white paint -amazon.com
Small foam paint brush -amazon.com
Sikaflex 291 adhesive & sealant - amazon.com
Painters tape
Tape measure
Acetone
The Install
We have to apologize in advance for the lack of pictures in this post, but much of this install required both of us to be involved, leaving nobody to man the camera.
The first step of this install was to figure out exactly where we wanted to place the awning. We set up two ladders, one towards the front and one towards the back and hoisted up the awning (50lbs) to get a general idea. We marked the van with tape where we wanted the ends of the awning and from here on would use the adapters to finalize the location. We temporarily set the adapters on the awning (on the ground) and measured how far past each adapter the awning protruded. We wanted the awning to cover as much of the passenger side sliding door as possible, but had to work within the recommended placement of the adapter from Fiamma and the contouring of the van. As you can see from the image below, the adapter needs to align with the deployment mechanism of the awning. We also needed to ensure that the area behind the 8 bolt holes on the adapters on the interior of the van was clear and accessible to ultimately secure the washers and nuts.

Once we had chosen the lateral (left and right) location for the adapters, we marked the outside edge of the adapters with tape and began working on the height of the adapters. There are three main considerations when working on the height; can the awning deploy clear of the sliding door, are the two adapters level and are the adapters both vertical vs slanting up or down (see right side of the picture below)

We started by working on the height of the front adapter, as it was more challenging to work with the downward slope of the van roof above the windshield. We positioned the adapter as high was we could, while keeping it vertical and below the slope of the van roof. Once in position, we secured the front adapter to the van temporarily using 2 of the 8 screws while we began to work on the rear adapter.

We aligned the left edge of the rear adapter to the previously positioned tape and used a string line level to adjust height. This was the most challenging part of the install as the van is not level on the ground, so along with the string line level, we had to make some eyeball adjustments to both the front and rear adapters. After these adjustments, we realized the right side of the front adapter needed to be set slightly away from the van to get it level. We achieved this by placing a few plastic spacers from the hardware store on the screw behind the adapter (see image below).

We used Sikaflex along with the mounting hardware that came with the adapters to secure the adapters to the van. With the adapters in place, we hoisted up the awning, set it on the adapters and check to ensure it deployed properly and clear of the sliding door.

After a few successful tests of deploying the awning, it was now time to secure the awning to the brackets with a few screws provided from Fiamma. This step was a bit tedious as you are working in a small space in the awning, but nothing a pair of needle nose pliers could not handle.
The last step of the awing installation was to attach the rain guard. There is a small gap between the awning and the van which allows water to drip when it rains. The rain guard (from Fiamma) is a rubber moulding which attaches to the top of the awning and covers this gap. While it does sort of "snap" in place, we recommend securing it with Sitaflex. We learned this the hard way after our first rain guard (which we had only snapped in placed) disappeared one day.
With the rain guard in place, the awning install was complete and ready to tackle the beating sun and showers of summer!
*Quick disclaimer- while the links above are products we do honestly use and love, we are Amazon Associates and earn from qualifying purchases.


3 comments
Larry McMahon
Jim,
I am sitting here knocking on wood, with that said, yes the awning has held up well. We are very careful not to leave it out in the wind. The mounting brackets are seem to do a nice job distributing the weight of the awning. The awning has saved us from both the sun and rain on countless occasions and I would highly recommend it!
Jim Kemp
This is really helpful. Has this installation method held up well in use? I don’t plan to leave my awning deployed if the wind comes up, but I’m concerned that the thin sheet metal that the adapters are bolted thru will distort permanently if there’s even a little bit of torquing of the awning by the wind.
This is really helpful. Has this installation method held up well in use? I don’t plan to leave my awning deployed if the wind comes up, but I’m concerned that the thin sheet metal that the adapters are bolted thru will distort permanently if there’s even a little bit of torquing of the awning by the wind.
David Moore
Appreciate you sharing this info.
Appreciate you sharing this info.